I’ve recently recently built a new storage server (post coming up). This being the first time I’ve had access to a server board, I had some problems accessing the IP management interface that is provided by Supermicro mainboards.
This IP management interface (IPMI for short) allows you to do all sorts of nifty things, like powering the server on or off remotely, or configuring the BIOS without having to connect a screen and keyboard. There’s some old information on the internet, and I also wanted to write down the detailed instructions, so others don’t have to go to the same trouble as I did.
Prerequisites
We’re using a Linux laptop to access the IPMI, so you’ll need that. That laptop should also have an ethernet port. Either you’re lucky, or (very likely), you’ll need a USB ethernet dongle. These are a dime a dozen, so you’ll hopefully have one lying around. Oh, and also a cable for doing the connecting.
Finding the credentials
Lots of pages on the internet say that the default credentials for Supermicro mainboards are “ADMIN/admin”. This is no longer true. Supermicro has gone with the times and is now setting a random default password on the IPMI interface. Theres several ways to find this password, the easiest being looking for a sticker on the mainboard or the protective CPU cover.
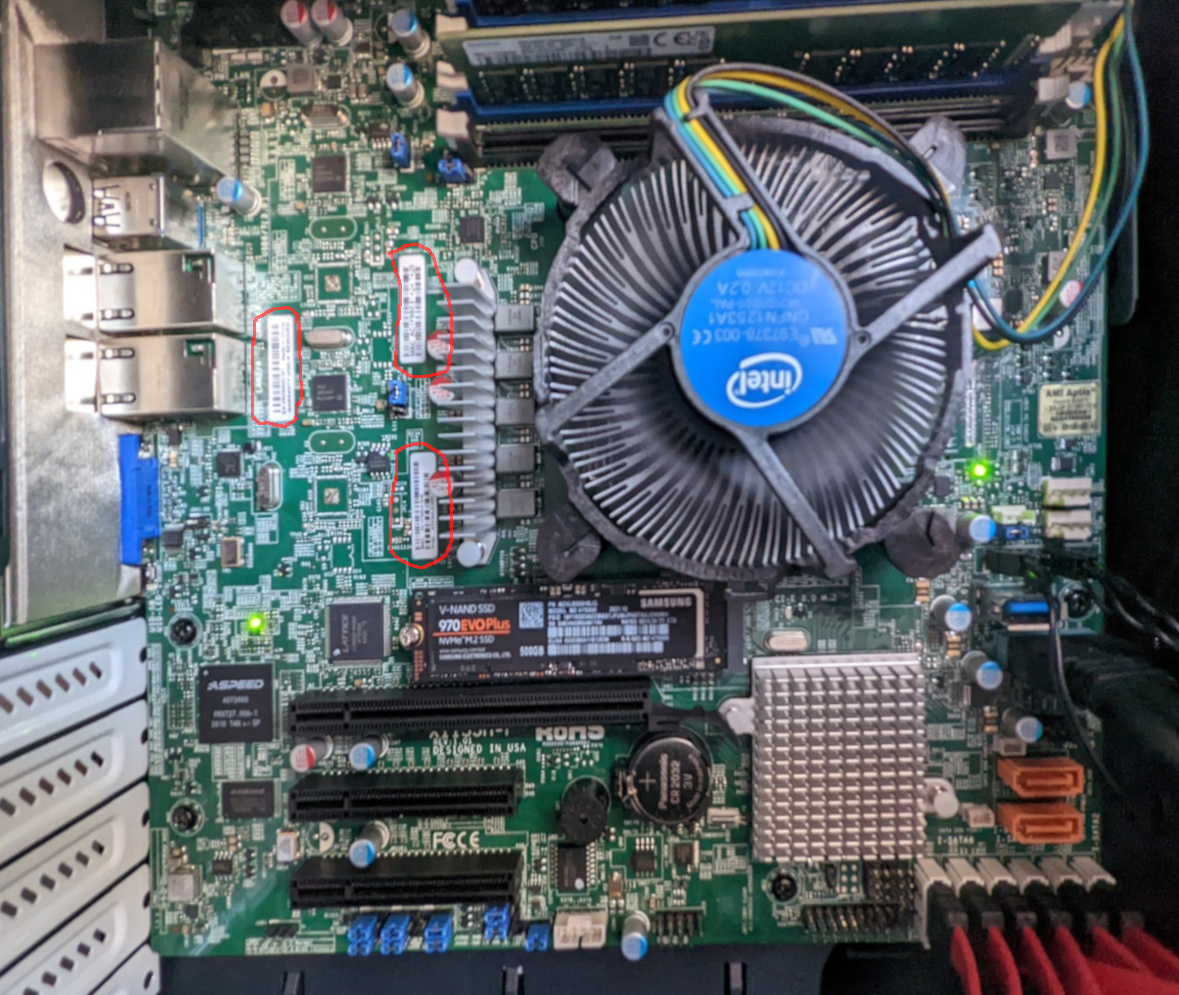
Here’s the stickers highlighted. Enjoy my shaky hand.
The credentials are also printed on the packing label. If you need more help finding the credentials, have a look at the Supermicro documentation. Luckily, the sticker on the mainboard is non-removable, so even if you’ve thrown away all othe other labels, it’s still on the mainboard. Even better if you’ve accidentally chosen a case with a window (now who would do such a thing?)
Connecting
Armed with these credentials, you can now connect to the server via ethernet. Take care to choose the right ethernet port – one will be labeled as IPMI_LAN on the mainboard schematic.
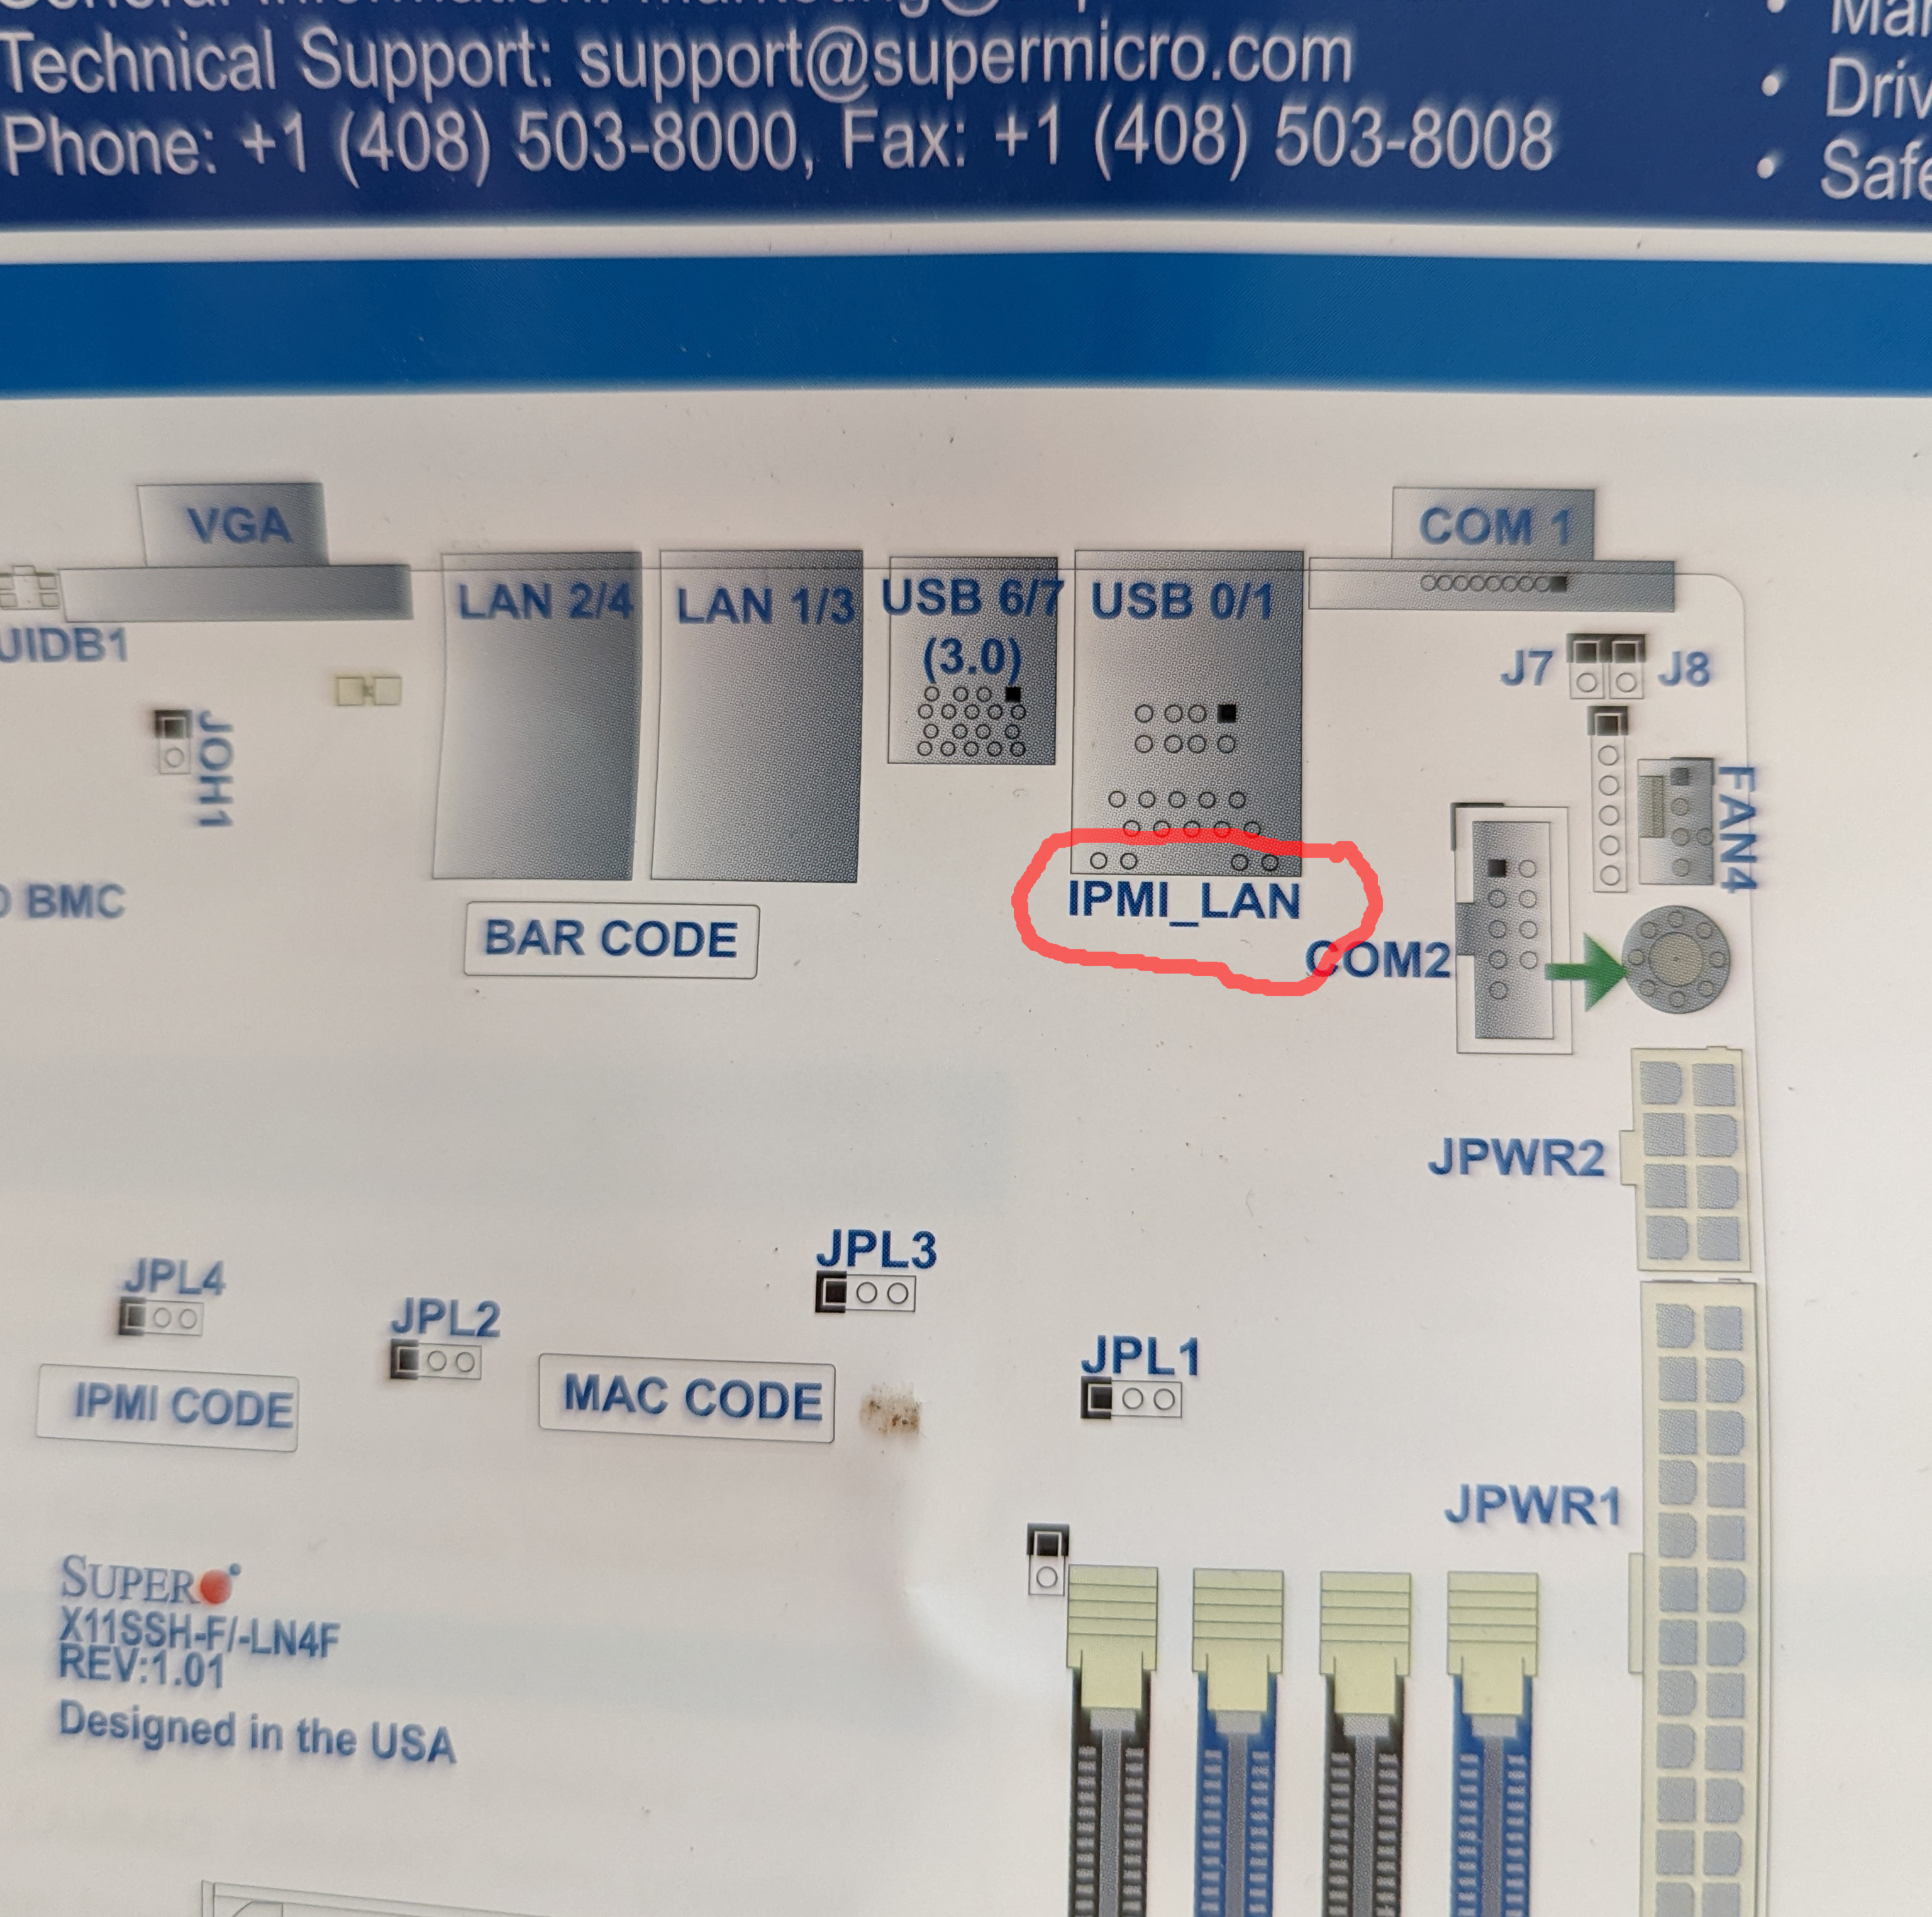
Find the IPMI port, and be sure to use that one.
By default, IPMI is running a DHCP client, so what we’ll need to do is give it a server so it can get an IP address. The dnsmasq server is a small implementation of a DHCP and DNS (who’da thunk?) server. It should be available for every distribution, since it’s widely used (it’s probably what’s running on your router, for example).
Modern Linux distros are often running NetworkManager (which, for the record, I have no problem with). However, in this case, NM will interfere by trying to configure the network interface itself. We can stop this interference by telling NM to not manage the ethernet interface we’re using for accessing the IPMI: nmcli device set <your-interface> managed no. You’ll need to do this whenever you reconnect your USB network interface or reboot, as the configuration isn’t persistent.
Then, you also need to add an IP address to the interface. dnsmasq doesn’t do this, and why should it? It tripped me up for a minute though. So do a sudo ip a add dev <your-interface> 192.168.1.1/24 to give your ethernet interface an address.
Finally, you can run dnsmasq on the interface via sudo dnsmasq -i <your-interface> -d --dhcp-range=192.168.1.20,192.168.1.40. The -d keeps dnsmasq in the foreground, so you can see whether it worked. Take care that the DHCP range chosen is reachable via your network interface: IPMI having an address isn’t useful for us unless we also know how to reach that address via the network interface. The addresses in the DHCP range should thus lie within the subnet you’ve configured for the ethernet interface. In this case, it’s correct.
Now, turn on the server. Wait a (surprisingly long) time, about 30 seconds to a minute. dsmasq should at some point tell you it received a DHCP request and gave out an address (most likely 192.168.1.20). You can then open your browser and go to that address.
You’ll see a login screen, where you can use the credentials you’ve previously unearthed. Say “I’m in” in your best hacker voice.
The next step you probably want to take is maybe changing the password, and configuring the IPMI interface to use a fixed IP address so you don’t have to go through the dnsmasq dance every single time. Just make sure you don’t forget what that IP address is.
What to do with it?
You could update your BIOS. You could also install NixOS, which I’ll write about in the near future.
You can now power on and off your server remotely, you can edit BIOS settings without connecting a screen or a keyboard. You can also configure the management controller for serial over ethernet, so you can get serial console output via the IPMI interface, but I haven’t done that. You can also add virtual media. For boot media larger than a floppy, you’ll need the icedtea-netx Java Web Start package to run the Java IPMI client, since that one can host virtual media without setting up a Samba server.